Static site development
As a Gatsby first timer, I would like to share some things about how this site works and maintained. This is the last part of a three part series on this site.
Key takeaways:
- Gatsby is used for static site generation. We first build the site, then we create content.
- GitHub automated workflow builds and deploys the site at each commit.
Current workflow
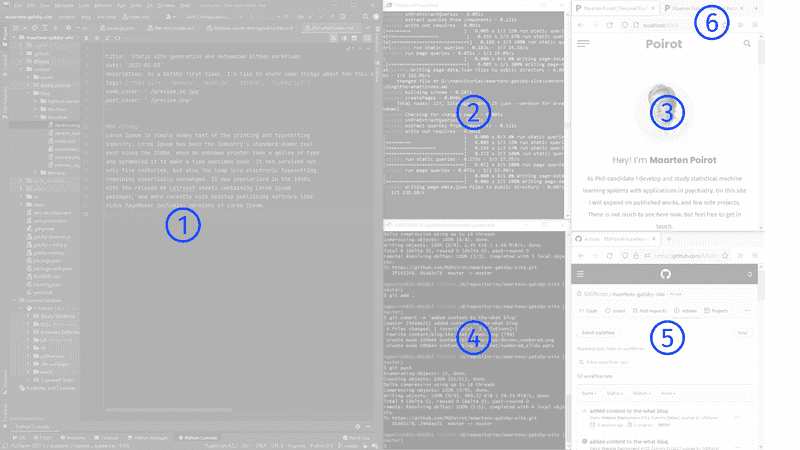
This post will cover the setup of this website using Gatsby. In addition, we will discuss speeding up development using GitHub automated workflows. This way we create one seamless development process, which will look like this:

- We write code in our IDE of choice
gatsby developwill initiate a development server that you can use to preview your site in the browser.- We can preview our progress at runtime at
http://localhost:8000/ - When we are ready to publish our changes we can commit these to the remote repository on GitHub.
- The remote GitHub repository is equipped with instructions to build our Gatsby site and deploy it to AWS S3.
- Finally, the result is deployed to the DNS.
1. Coding
This website uses Gatsby as a static site generator. Setting up the website is a two-step process:
- Build: Define how Gatsby should process content, mainly in TypeScript.
- Maintain: Provide content for our website. Mainly in markdown.
2 & 3. Gatsby
Lorem Ipsum is simply dummy text of the printing and typesetting industry. Lorem Ipsum has been the industry’s standard dummy text ever since the 1500s, when an unknown printer took a galley of type and scrambled it to make a type specimen book. It has survived not only five centuries, but also the leap into electronic typesetting, remaining essentially unchanged. It was popularised in the 1960s with the release of Letraset sheets containing Lorem Ipsum passages, and more recently with desktop publishing software like Aldus PageMaker including versions of Lorem Ipsum.
4 & 5. GitHub Automated workflow
Please take note how secrets were NOT stored in plain text but appropriately stored as secret. Storing passwords in plain text is always bad practice, especially when you forget about it and publish your work at some point. If you think this practice is obvious, you might want to have a word with this guy (article in Dutch) from the Belastingdienst (Dutch tax and customs administration).
GitHub Action for static website deployment on AWS S3
name: Static Website Deployment
on:
  push:
    branches: [ master ]
  pull_request:
    branches: [ master ]
jobs:
  build:
    runs-on: ubuntu-latest
    steps:
    - uses: actions/checkout@v2
    - name: Build Website
      run: |
        yarn
        npm run build
    - name: Configure AWS credentials
      if: github.event_name == 'push'
      uses: aws-actions/configure-aws-credentials@v1
      with:
        aws-access-key-id: ${{ secrets.AWS_ACCESS_KEY_ID }}
        aws-secret-access-key: ${{ secrets.AWS_SECRET_ACCESS_KEY }}
        aws-region: ${{ secrets.AWS_REGION }}
    - name: Deploy to S3
      if: github.event_name == 'push'
      run: aws s3 sync public s3://${{ secrets.AWS_BUCKET_NAME }} --delete
    - name: Invalidate Cloudfront
      if: github.event_name == 'push'
      run: aws cloudfront create-invalidation --distribution-id ${{ secrets.AWS_CLOUDFRONT_DISTRIBUTION_ID }} --paths "/*"
6. Website
Done! That was easy!


